
I positively love the way ball joint dolls can seem to come to life and be posed in a myriad of different ways. I've wanted to make one for years, but I never make enough time available to complete one. This delicate little sculpture is Lin by Nefer Kane, Nefer's dolls are all so unique and possess much personality. I preordered her here: www.ckdolls.com
I ordered a blank doll so I could have the joy of painting and costuming her myself. I plan to paint her last, as I've never painted resin before and I am not looking forward to taking her apart to do it! Everything but the sculpture will be done by me. Designing and hand sewing clothes, making a wig, making custom jewelry, and painting her and her friend baby Cthulhu! Baby Cthulhu is a Monster Minds sculpt I pre-ordered blank on Kickstarter. If you want your own, you can contact the artist here: http://www.monstermindsculpts.com
Once I'm done working on Lin, I plan to start making Ball Joint Doll jewelry to sell on etsy. Both jewelry intended for dolls to wear, AND Ball Jointed creature jewelry meant to be worn by people. A mer-cat is currently my plan for the first doll, but no promises. I work better on whim!
Work in Progress Photos:


I made her some bling! The bracelet, which is really tiny, fits her great. The pendant I made is way too big, so I'll be making a new one.

So small! Twin dragon fine silver cuff bracelet with a purple sapphire.

Her hair is done! It is okay Cthulhu, you will get paint soon too!

I wanted her to have fun dreadlocked hair, but wasn't sure that would work with nylon. So I braided a rainbow of embroidery floss into her hair. This also took a very long time! When braiding I was careful to try and grab hairs from different wefts to leave no large gaps between the braids where the cap would show through. I'm super happy with how it turned out, the whole thing is really secure and not going to come undone by itself. I used a scrap of Grip Strip from an old hardback iPhone case from Portenzo.com to hold the wig in place. In unrelated news, they aren't making cases for phones as old as mine anymore, drat! The case I'm currently using will likely wear out before I want to buy another phone. And looks like they discontinued the hardback case for iPads, which is sad because I love mine.

The wig wefts were carefully coiled around the wig cap, and sewn in place by hand with a matching thread. This also took longer than expected! Expect everything to take a long time. :) I ended up needing a 4th weft because I placed them so close together on the cap. I didn't want any gaps. Once all the wefts were on I sewed around the edge of the cap to tighten it to fit her head perfectly. The hair ended up being a bit too thick... In the future I would spread the hair out thinner when making wig wefts.

These wig wefts also took about 2 hours to complete. That is more like it! I layered different shades of nylon hair over plain paper, secured them with masking tape, sewed them down with a line, folded the hair over itself, sewed back over the line again, and zigzagged over the line to lock everything in place. Removing the masking tape was no fun, and then the paper was torn off. Then I used fine tweezers to remove the little bits of paper from between the stitches, and added a bit of sealant on the stitches to help lock the hair in place.
This is the result of 2 hours of rooting hair. I don't have that much spare time to dedicate to this hobby right now... so time to try wefting!

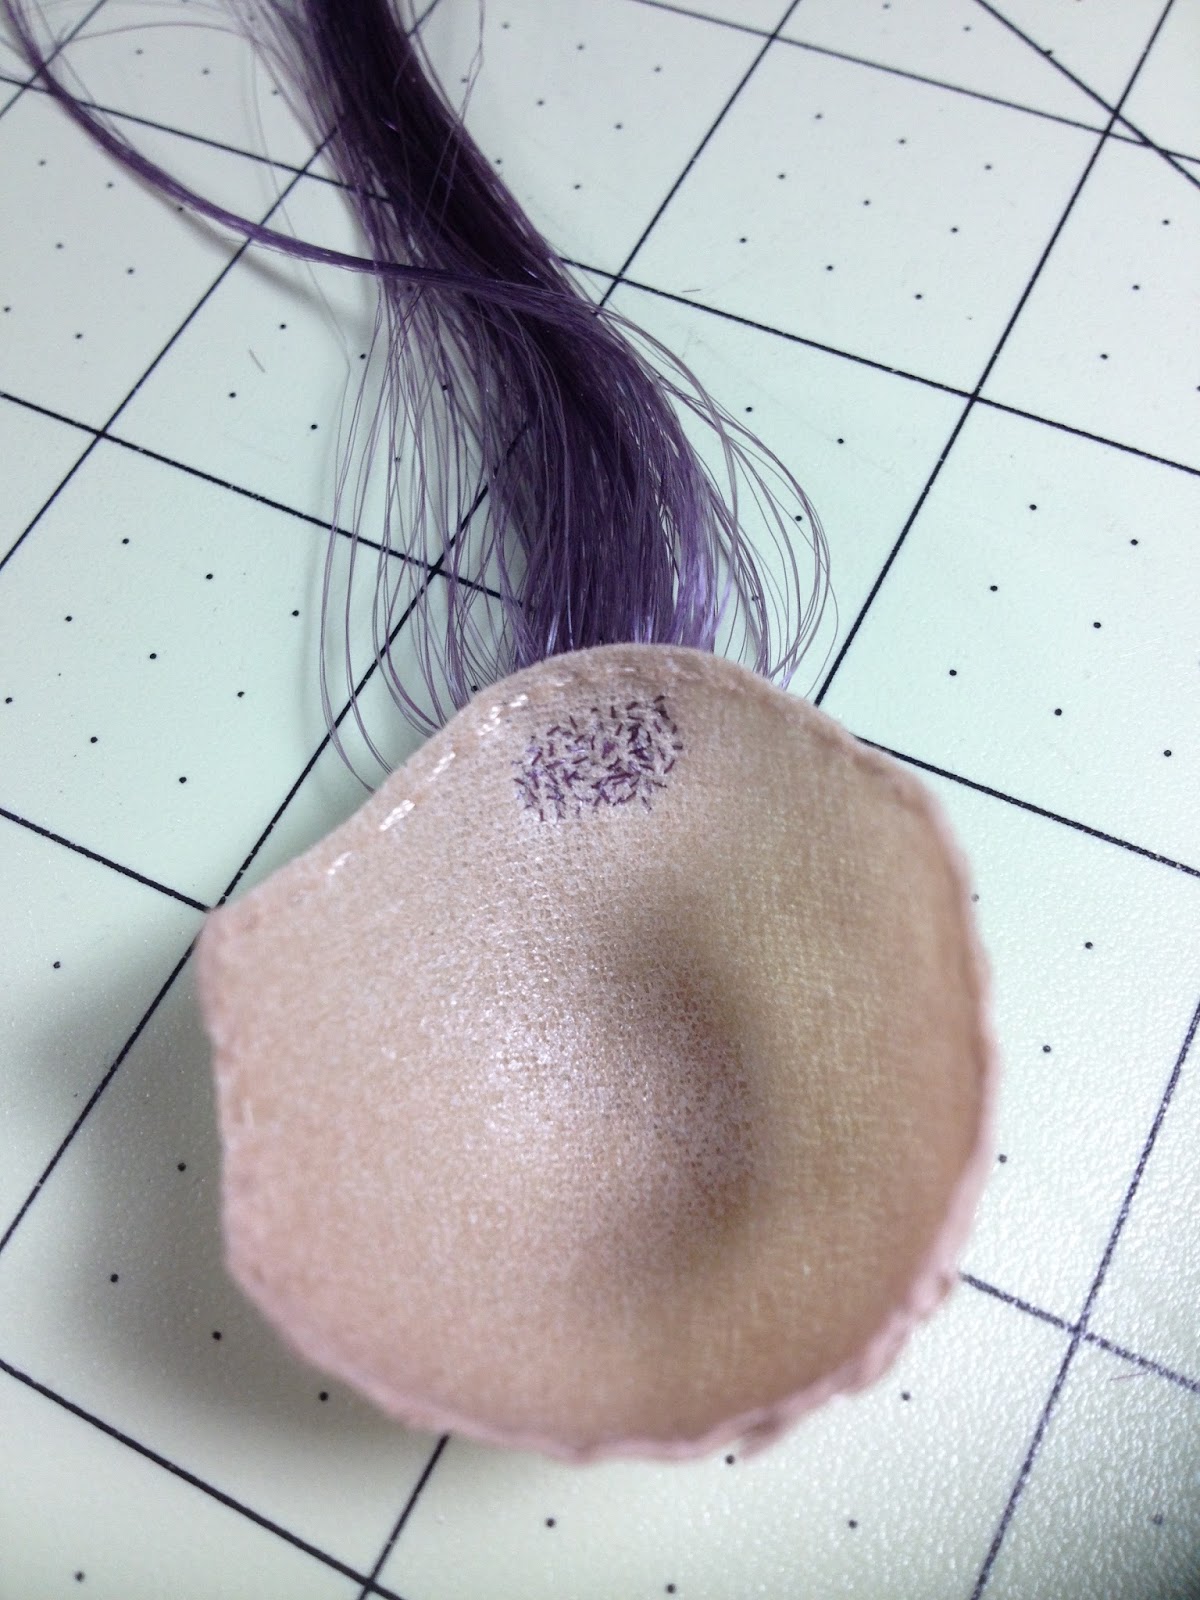
First, I tried rooting the hairs 4 at a time directly into the wig cap with a beading needle. I really didn't want to use glue on my wig, I wanted it to look as natural as possible. Here you can also see that her dress is being colored. I'm using watered down acrylic paints to dye areas a darker shade.

I kind of hate this part. She needs a wig cap, but it looks like I'm suffocating her. Saran wrap around the head and body, nylons over her head, and I used outdoor matte sealant to stiffen the fabric. Later I made another cap I liked better, for that one I doubled over the fabric so there were 2 layers, and used 2 layers of sealant.

I designed and made her a little dress. It is so tiny I had to sew the whole thing by hand. In hindsight, I should have used a more flexible fabric, but it turned out pretty good anyway.

Still a little shy.

Just arrived from France!
No comments:
Post a Comment